Shaved Fennel Salad

Hey hey,

For years I have seen people on cooking shows make fennel salads and it all looks so fun and different, but I had never done it before.  UNTIL NOW.  I was surprised at the taste – it’s a little bit sweet, but still yummy.  It definitely added a unique flavor.  Kinda fun to try and I want to do it again with a different dressing.

Oh and don’t mind the photos- I went a little overboard with the feta cheese. 🙂

IMG_6069

Shaved Fennel Salad (original recipe from 101cookbooks.com)

  • 1 medium-large zucchini, sliced into paper thin coins
  • 2 small fennel bulbs, trimmed and shaved paper-thin
  • 2/3 cup loosely chopped fresh dill
  • 1/3 cup fresh lemon juice, plus more if needed
  • 1/3 cup extra virgin olive oil, plus more if needed
  • fine grain sea salt
  • 4 or 5 generous handfuls arugula
  • Honey, if needed
  • 1/2 cup pine nuts, toasted (I used almonds)
  • 1/3 cup  feta cheese, crumbled

Combine the zucchini, fennel and dill in a bowl and toss with the lemon juice, olive oil and 1/4 teaspoon salt. Set aside and marinate for 20 minutes, or up to an hour.

When you are ready to serve the salad, put the arugula in a large bowl. Scoop all of the zucchini and fennel onto the arugula, and pour most of the lemon juice dressing on top of that. Toss gently but thoroughly. Taste and adjust with more of the dressing, olive oil, lemon juice, or salt if needed. If the lemons were particularly tart, you may need to counter the pucker-factor by adding a tiny drizzle of honey into the salad at this point. Let your taste buds guide you. Serve topped with pine nuts and feta.

Serves 4 to 6.

IMG_6068

Zucchini Noodles – Get Your Kiddos to Eat More Veggies!

I don’t know any mom who can get her child to eat any vegetable any time.  Some are better at it than others, and mine do alright, but they still revolt when things look weird (or just because they want to).  Not too long ago, I tried a recipe that had julienned zucchini in it.  After peeling the zucchini I honestly couldn’t see it amongst all the spaghetti noodles.  I wanted to try it with the kids and see what happened.

Have you ever seen one of these before?

It’s called a Julienne Peeler.  I borrowed it from my neighbor and let me just say, it saves A TON of time in julienne-ing veggies.  It is just like a regular peeler, except it has these little teeth in it that slices things into thin strips. 


Piece of cake!

So I took about 4 zucchini and peeled and sliced them (I only peeled them because I wanted to disguise them from the kids).

Here’s what it looks like all sliced up.


I just cooked pasta like normal and threw the zucchini in for the last 3 minutes or so.  It softens up pretty fast.

The sad news is that I thought I had spaghetti in the pantry and I didn’t!  I had to use different pasta so it didn’t end up being as disguised as I would have liked, but the kids still ate it!  Woop Woop!!


Here’s another pic with spaghetti noodles so you can get the idea (from The World According to Egg Face).

It’s pretty tasty, and you really can’t tell you are eating zucchini. 🙂

Happy Disguising!


Zucchini and Asaparagus with Lime and Cotija (what a mouthful)

I have really been loving this website lately… I sometimes get in a food rut and I need some new flavors to switch it up.  I had a couple of zucchini and some leftover asparagus in my fridge so I wanted to find an exciting way to eat them.  Voila!  For the Love delivers again.  This was such a fun and easy thing to make, and everyone ate it- no leftovers!  Plus let’s face it – vegetable leftovers are blah the next day.  Here’s the recipe.

zucchini (and Asparagus, or any vegetable really) with Lime and Cotija Cheese (original recipe from For the Love of Cooking)

INGREDIENTS:

  • 2 zuchinni, cut into spears
  • 1 bundle of asparagus
  • 2 tsp olive oil
  • Juice of one lime
  • Sea salt and freshly cracked pepper, to taste
  • Zest of one lime
  • Cotija cheese, grated

DIRECTIONS:

Cut the zucchini into spears then place into a shallow bowl. Drizzle the top with the lime juice, olive oil, sea salt, and freshly cracked pepper, to taste. Toss to coat evenly.

Heat a grill pan over medium high heat then coat with cooking spray. Place the zucchini into the grill pan and cook on each side for 1-2 minutes or until it has nice grill marks all over and the zucchini is tender. Place the zucchini on a serving plate then sprinkle the top with lime zest and grated cotija cheese.

Consensus:

Tornado ate some and ate the cheese off the rest.  The Wild One refused at first but agreed to take one bite.  No worries, I ate his leftovers.  The Mr. and I ate the rest and ohhh boy was it delicious!

Grilled Veggie and Smoked Fontina Pizza

First of all, a quick shout out to all my friends and family in New York.  Luckily they are all safe.  Have you seen the footage of Hurricane Sandy?  Here’s the World Trade Center site.  I was just there a few months ago!

My heart goes out to everyone there!

***

I love finding and trying new flavor combinations.  This new one did not disappoint.  It’s a veggie pizza without sauce!  I was a little skeptical but it ended up being yummy and fun.  The boys of course took off ALL the vegetables, but I figure if I make this enough times they are bound to at least eat a tomato or two.

Here’s the recipe.

Grilled Veggie and Smoked Fontina Pizza (original recipe from For the Love of Cooking)

  • 2 baby bell pepper, or 1 large bell pepper sliced
  • 10 spears of asparagus, ends removed and sliced in half
  • 1 zucchini, cut diagonally into coins
  • 1 red onion cut into wedges
  • 4 tsp of olive oil (divided)
  • Sea salt and freshly cracked pepper, to taste
  • 1 batch of pizza dough (I made two)
  • Smoked fontina cheese, shredded
  • Handful of grape tomatoes
  • Crushed red pepper flakes, to taste

DIRECTIONS:

Preheat the oven to 400 degrees. Lightly grease a cookie sheet.

Preheat the grill to high heat (I just used a regular frying pan). Drizzle the bell pepper, zucchini, red onion, and asparagus spears with a little olive oil then season with a bit of sea salt and freshly cracked pepper, to taste; mix until evenly coated. Place on the grill rack; grill 8 minutes or until tender.

Meanwhile, place the dough onto the baking sheet. Drizzle a bit of olive oil on top of the dough then season with sea salt and freshly cracked pepper, to taste. Place into the oven and cook for 5 minutes.


Remove the veggies from the grill. Remove the dough from the oven.

Sprinkle with cheese then place the veggies on top along with a handful of grape tomatoes.  Season again with sea salt, freshly cracked pepper, and crushed red pepper, to taste, if desired.

Place into the oven and bake for 13-15 minutes or until the dough is golden brown and the cheese has melted. Slice and serve. Enjoy.


New Favorite: Black Bean and Vegetable Stuffed Poblano Peppers

Woah, folks, have you ever had a poblano pepper?  I hadn’t.  I went to the store to get some, and looked and looked, but couldn’t find them.  I finally spotted something that looked just like them, but it said, “pasilla peppers.”  Luckily, I had my iPhone so I quickly looked it up and sure enough, they are the same thing.  Here in Utah where everyone is a gringo, the checkout lady said, “These are called Prascilla (Pruh-SILL-uh) peppers, right?”  And I said, “Close enough,” and laughed to myself.  But I grew up on the border of Mexico, so I am used to the gringos trying to pronounce things correctly.  Pretty funny.

So…This was a little bit time consuming, but TOTALLY worth it!  You have to broil the peppers until the skin turns black, and then let it sit for a few minutes before you peel  the skin off.  I totally didn’t know what I was doing, and it turned out great.  So have no fear!  Be adventurous!


(The pepper is under there somewhere, I promise!)

Black Bean and Vegetable Stuffed Poblano Peppers (original recipe from For the Love of Cooking)

  • 3 poblano peppers
  • 1 can of black beans, drained and rinsed
  • 1/2 cup of cotija cheese (I’d never had this before either, and it really made a difference in the flavor.  Definitely use it!)
  • 1/ cup of orange and yellow bell pepper, diced
  • 1/2 small sweet yellow onion, diced
  • 1 cup of frozen sweet yellow corn, thawed
  • 3 tbsp cilantro, chopped
  • 1 zucchini, diced
  • 1 large handful of grape tomatoes, sliced
  • Sea salt and fresh cracked pepper to taste
  • 1/2 tsp of cumin
  • Dash of oregano

Clean the poblano peppers and carefully slit them down the center (be careful not to go all the way through the pepper). Gently remove the seeds from the inside of the pepper. Line a baking sheet with tin foil then place the pepper on top.

While they are broiling, make the black bean mixture.  Combine the black beans, bell pepper, onion, cilantro, zucchini, corn, tomatoes, all but 2 tbsp of cotija cheese, oregano, cumin, sea salt and fresh cracked pepper, to taste. Mix all ingredients thoroughly.

Preheat the oven to 350 degrees. Coat a glass Pyrex dish with olive oil cooking spray. Place the roasted peppers in the dish. Carefully stuff each pepper with the black bean mixture. Top each pepper with the remaining cheese.

Place in the oven and bake uncovered for 20-30 minutes or until the vegetables are cooked and the cheese is melted.

Serve with guacamole and sour cream or salsa. Enjoy.

Consensus:

Smashing hit all around, except the kids just had some leftover chicken and didn’t get to try it.  Maybe next time!

Recipe: Green Goddess Grilled Cheese

My sis-in-law showed me this recipe from Pinterest and I had to have it in my stomach ASAP.  And I made it twice in a week. haha!  It’s really yummy, fast, and easy.  We had some homemade bread to use up, so it was extra tasty!  Plus, the pesto makes a lot, so leftovers are easy to do in a few days.  If you are in a time crunch, but still want something yummy and healthy, give this a try.

Green Goddess Grilled Cheese (original recipe from tastespotting.com)


Ingredients for 1 Sandwich

  • 2 slices bread (we used a white bread, but one filled with lots of different whole grains and seeds would be *awesome*)
  • 2-3 tablespoons Green Goddess Herb Pesto (recipe below)
  • 2 slices mild white melty cheese like mozzarella
  • handful fresh baby spinach
  • ¼ avocado, sliced
  • 2 tablespoons goat cheese, crumbled
  • olive oil (and butter if you’re so inclined)

Directions

Spread about 1 tablespoon of Green Goddess Herb Pesto onto each slice of bread (2 tablespoons total, but if you’re sensitive, go light, the pesto is STRONG).

On one slice of bread, add 1 slice of cheese, sliced avocado, crumbled goat cheese, spinach, second slice of cheese, then top it with second slice of bread. Press together gently.

Heat 1 tablespoon olive oil in a frying pan over medium low heat. (If you want to use butter, add it to the oil and let it melt). Add the sandwich to the oil and cook until bread is golden brown. Press down on the sandwich lightly, then flip the sandwich over and cook until second side is golden brown.

Green Goddess Herb Pesto

Ingredients

  • 1 clove garlic
  • 1 (or 2 if you’re ballsy) anchovy fillet (in oil) – I actually left these out and it was still very tasty.
  • ½ small shallot, chopped (about 1 tablespoon)
  • 1 teaspoon lemon juice
  • handful chopped fresh Italian parsley
  • handful chopped kale
  • 2-3 tablespoons chopped fresh tarragon
  • 1 tablespoon chopped chives
  • ¼ cup olive oil
  • salt and pepper to taste

Directions

Pulse garlic, anchovy, and shallot in food processor until chopped. With the food processor running, add lemon juice, parsley, kale, tarragon and chives. Very slowly drizzle in olive oil until kale and herbs get sufficiently chopped and everything is the consistency of a pesto. You may need more or less of the olive oil depending on how big a “handful” of herbs is to you. You can also turn off the food processor and push herbs down the side of the bowl with a spatula every once in a while.

Season to taste with salt and pepper (You probably won’t need too much salt if you used 2 anchovies).

Consensus:

SOOOOO Delicious!  The flavor combination is unreal.  It was definitely very tasty, and the boys ate it!  I mean, The Wild One peeled some spinach off, but he ate the rest so I was happy!


What’s for Dinner Wednesday: Homemade Spaghetti Sauce from Frozen Tomatoes

Did you know you can freeze tomatoes?  I thought it was frowned upon, but I saw (here) the other day that you can totally do it!  We got a bag of free tomatoes a few weeks ago that were about to bite the dust, so I threw them in the freezer.  Today I dumped them in a crockpot with a few seasonings and by the end of the day I had homemade spaghetti sauce.  Voila!  It was a little bit runny, but that’s my only complaint.  Anyone know how to fix that?  I heard that if you make spaghetti sauce from scratch, you are supposed to de-seed them first.  Maybe that was my problem.

Anyway, here’s how you do it.  (Originally from Superhealthykids.com)


Homemade Spaghetti Sauce from Frozen Tomatoes


  • 3 frozen, whole tomatoes
  • 3 cans diced tomatoes
  • 3 Tbs Italian Seasoning
  • I also added a bit of salt to taste

Dump it in the crockpot and cook on low for 5 hours or so.  After the tomatoes defrost, the peel comes off really easily. Just peel it off and throw it away.

The tomatoes just break apart and form this lovely mush.

After it’s done cooking, put it in a blender for a few seconds, and it’s ready to go!


What’s For Dinner Wednesday: Vegetarian Chili

Here’s the story folks:  Beans are cheap.  And I have a lot of them.  PLUS I knew I was coaching The Wild One’s Soccer game until late so I needed a good crockpot recipe.  And BAM!  Dinner was born.  I whipped up some sweet cornbread this morning so it was ready to go and then I threw the rest in the crockpot. If you need a whole foods dinner in a hurry that is easy and yummy, this is a good one:

Vegetarian Chile (original recipe from Vegetarian.About.Com)

Ingredients:

  • 1 cup onion, chopped
  • 1 cup green pepper, chopped
  • 1 cup celery, sliced
  • 1 15 ounce can kidney beans (I used beans from scratch…probably about 2 cups worth)
  • 1 15 ounce can corn kernels
  • 2 16 ounce cans tomatoes, cut up (I used them fresh from the garden…about 6 small ones)
  • 1 6 ounce can tomato paste
  • 2 cloves garlic, minced
  • 1 1/2 tbsp chili powder
  • 1 1/2 tbsp ground cumin
  • 3 tsp salt
  • 2 tbsp cooking oil

Preparation:

Sautee the onion, green pepper and celery in a small amount of oil until translucent. Add the remainder of the ingredients and simmer on low 6-8 hours.
BINGO.  Easy as pie.

Holy Guacamole

I remember the first time I saw someone make guacamole. We had just moved from North Carolina to The BRONX, and I was scared out of my mind. I had met a really cool girl at church named Amber, and I thought – maybe I can be friends with her. Not 15 minutes later, I walked up to my building, and I looked up and lo and behold there was Amber. She lived in THE SAME BUILDING! What are the chances (seriously not good!). I was so happy I could have kissed her. We DID become good friends, and one night we showed up at their house for dinner (invited, of course). Her should-be-culinary-chef husband was working away in the kitchen finishing up some last minute touches. I asked if I could do anything and he handed me a bowl full of stuff, including avocados. “Wanna mash this up?” He said. I guess it had never occurred to me that people make their own guac! So I mashed it up and it was fabulous.

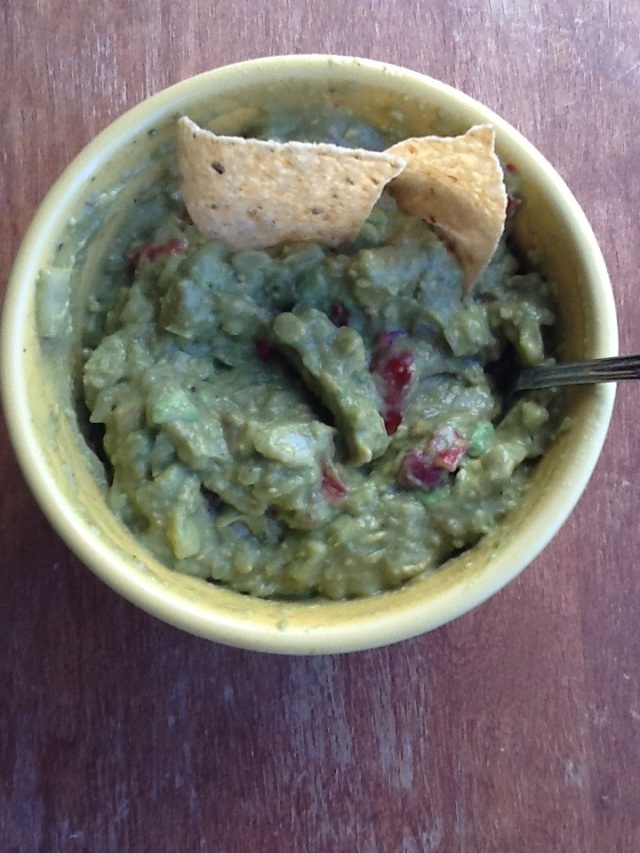
Fast forward 6 years and here we are. Last night we had a smorgasbord of taco salad ingredients laid out on the table and I was just going to chop up some avocados when I thought, “Hey! I should make some guacamole!” So I found a quick recipe and it took me all of 2 seconds.

Here it is:

20120903-230843.jpg

Easy Guacamole (original recipe from allrecipes.com)

  • 2 avocados
  • 1 small onion, finely chopped
  • 1 clove garlic, minced
  • 1 ripe tomato, chopped
  • 1 lime, juiced
  • salt and pepper to taste

Directions

  1. Peel and mash avocados in a medium serving bowl. Stir in onion, garlic, tomato, lime juice, salt and pepper. Season with remaining lime juice and salt and pepper to taste. Chill for half an hour to blend flavors.

The best part is that it has lime in it, so it doesn’t turn brown. Very delicious and quick.

From the Garden: Sauteed Veggie Pasta

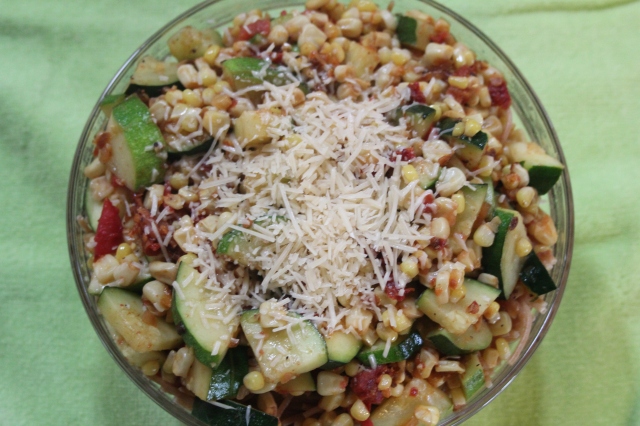
We’re back We’re back We’re back We’re back We’re back!!!!  We took a red-eye flight from New York back home, and less than 48 hours later we drove 10 hours to San Diego.  We are finally home and I am officially sick of traveling.  I came home to find a beautiful, humongous garden bursting with fruits and veggies in our backyard (our landlords have amazing greenthumbs).  We have plums, pumpkin, watermelon, tomatoes, tomatillos, zucchini, corn, carrots, beets, cucumbers, peaches, etc. etc.  I am in heaven.   There is so much food I literally cannot pick it and eat it fast enough.  Tonight I had no plan for dinner, so I just went out to the garden and picked what was ripe and then tried to figure out what to do with it.  I ended up with zucchini, tomato, corn, and cucumbers.  I put some olive oil in a pan, added garlic and onion, and sautéed the zucchini, and tomato til they were nice and flavorful.  Meanwhile I boiled some pasta, and added corn on the cob for the last 2 minutes.  I threw it all together with some salt and pepper, tossed in a few sun-dried tomatoes and sprinkled some parmesan cheese on top and we had a perfect meal!  For some reason I never think to put veggies over pasta, but it totally works.  Such a yummy meal and we got so many veggies in!  I also sliced up the cucumber and cut up some honeydew.  Man I love summer.  What am I going to do when all this yummy produce is gone?